Sentence mining is a language learning technique that involves extracting sentences from various sources,
like videos, books, or articles, to learn vocabulary and grammar in context. Kimchi Reader is a tool that
simplifies this process by allowing users to easily mine sentences from various sources. These sentences can then
be added to a spaced repetition system (SRS) like Anki, helping learners retain
information more effectively over time by reviewing them at optimized intervals.
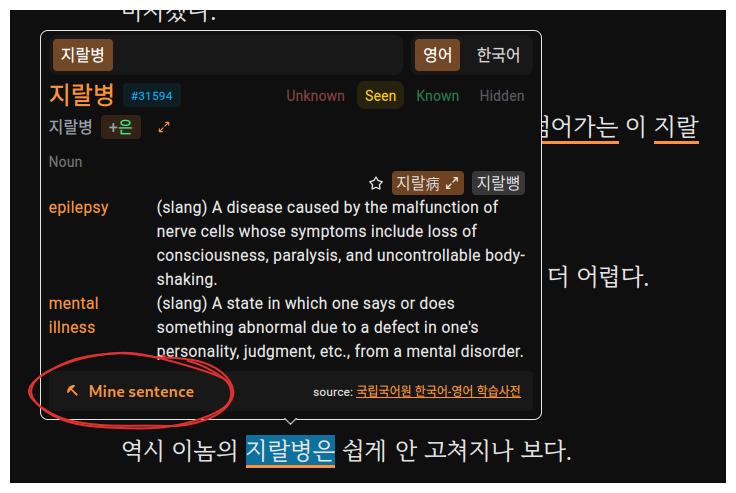
To sentence mine using Kimchi Reader, start by selecting a word in the content you're consuming, such as a video
or text. When the popup dictionary appears, click on the Mine sentence button at the bottom. This action will
capture the selected word along with its surrounding context such as the full sentence and accompanying
audio & image (when available).
Access the sentence mining popup by clicking on the mine icon
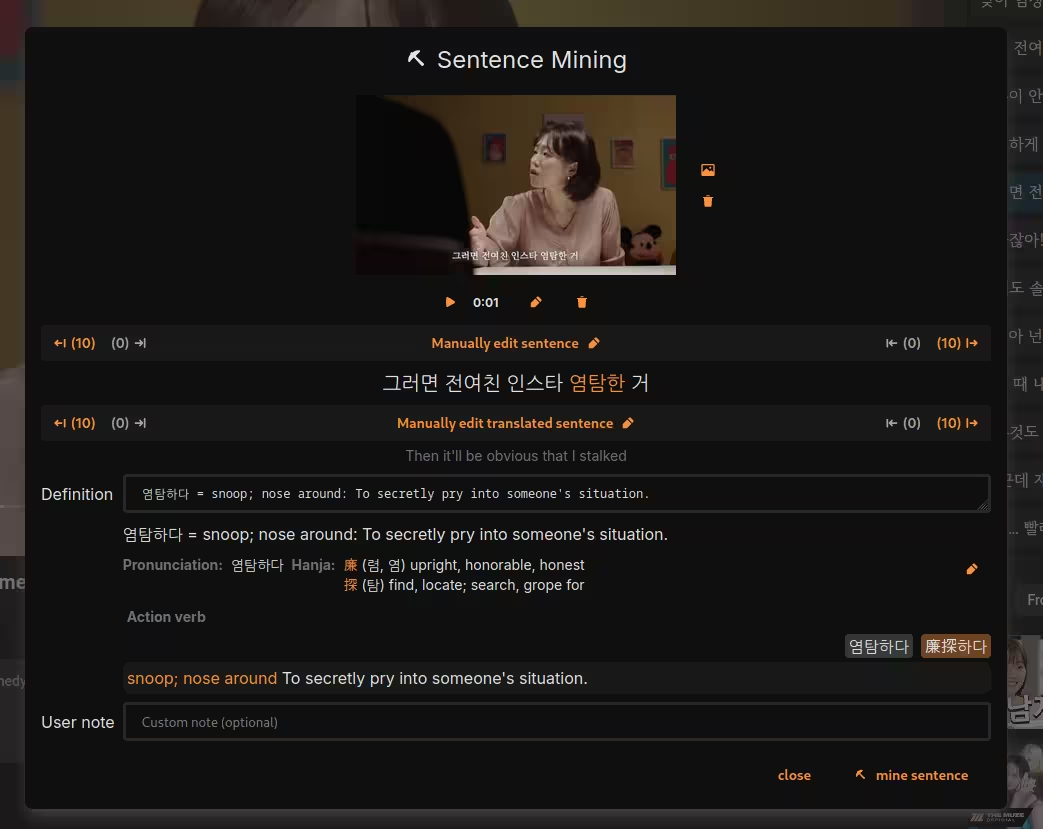
For this example, we're mining a YouTube video to demonstrate the process. After clicking the Mine
sentence button, a dialog will open displaying a screenshot and audio of the sentence, with the
focus word highlighted. In this example, we're fortunate that the word has only one definition, which gets
automatically selected. Additionally, the pronunciation and Hanja information for the word are included
in the dialog for a more comprehensive understanding. Once you have reviewed the details, simply click mine
sentence at the bottom, once again, to finalize the process.
Sentence mining dialog after selecting a word
Platform Note: Audio and screenshot capture availability varies by platform. On iOS, only screenshot capture is
available (YouTube and local media). See the compatibility table for full details.
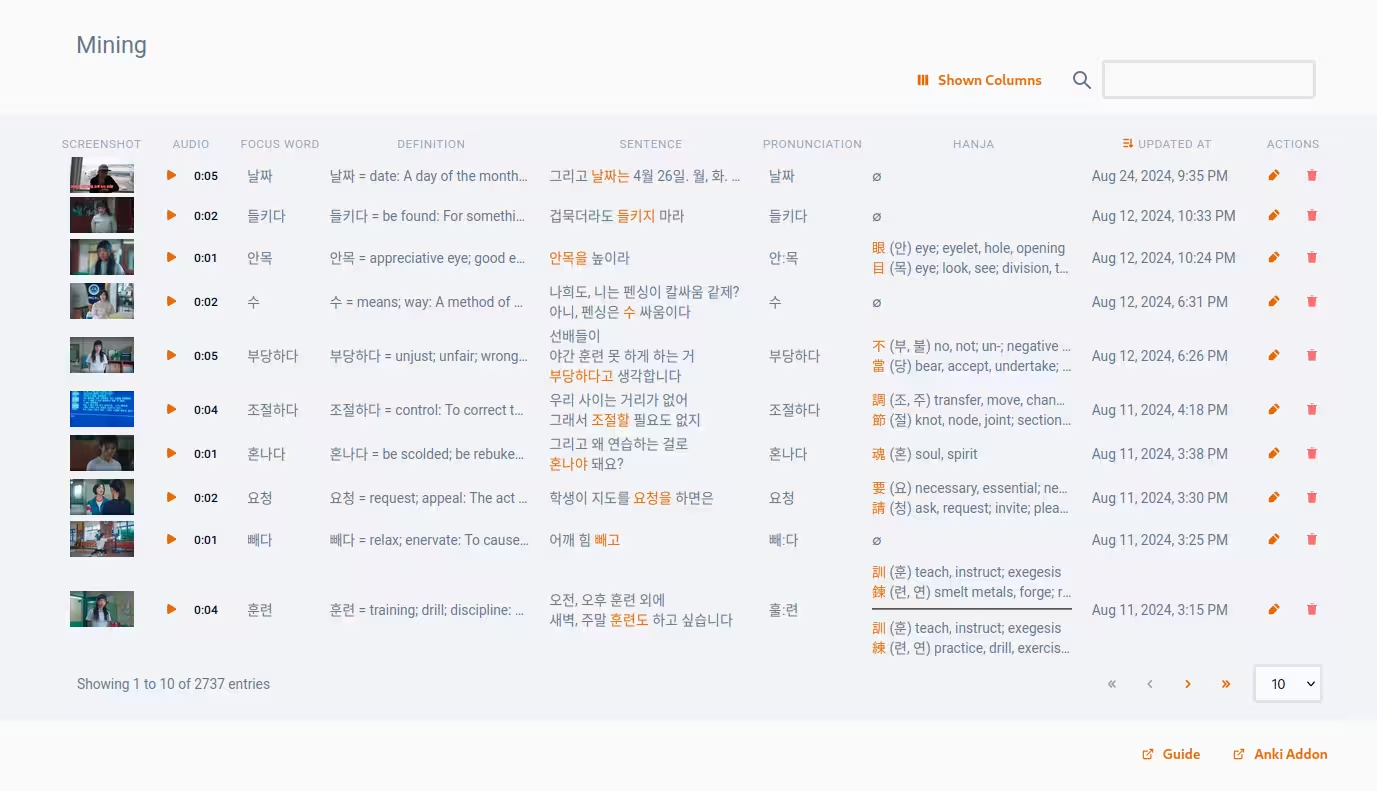
Once you've mined a sentence, you can view it in the mining section of the app.
A view of all sentences mined on your account
Please note that these sentences have not yet reached Anki at this point -- you will need to configure Anki to
sync with Kimchi Reader and then press the sync button to send the mined sentences to Anki. You can see more on the
Manual page for Anki. It is totally fine to mine first then configure later on.